


Beyond PVP
Whereas in previous Hyperspace levels, you were limited to just one large arena - Or just two arenas, such as in Hyperspace Standoff, in this spinoff you get to fly to different star systems entirely. The minigates will instantly teleport you to the connected system. The red and blue base are seperated by a virtual canyon in space. Each base is in its own system, and there is one middle system that seperates them. That means you have to fly through this system to get to the other base. Originally, I was going to put each base further apart - But figured people would get bored spending all that time flying around using up energy, only to get shot down by a super missile or by a lucky bullet from an NPC swindler.So you ask, what happens if you go beyond the "centre systems?" - Well, go see for yourself. There is a total of nine environments to explore. Each system will feature NPC ships - pirate factions bent on destruction. Well, mostly your destruction. From the centre of the map they'll be relatively easy, but as you venture to the systems further out, they might get a bit tough for newbie pilots or may require gangs to take down. Some systems will include a base of somesort - Which could be a pirate outpost, abandoned mining post or something quite different! Additional weaponry can also be salvaged from destroyed NPC ships.
The environment itself is persistant - Some ships will take a long time to appear, others will not appear until after you've already destroyed a certain group. It could take you hours to discover every single spawn Basewars has to offer, from small fighters to huge ships. Some of the scenary is more than just scenary - you can interact with it or change it by destroying it - Look out for missions and gauntlets which you can go to. Beware, some of these are very hard and can't be done alone!

 Step 1
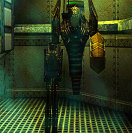
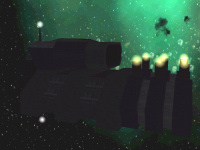
In your base. This is where you start. Straight ahead is the exit, to the first left and right is the armory - Directly below the spawn room.
 Step 2
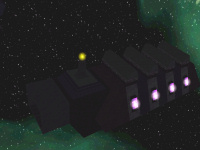
Ten different types of weapons spawn here. The biggest weapons will take 3-4 minutes to respawn, so try not to hog! Also, you can collect Platforms outside of the station in the "Storage Silo". These are best used to defend your base, and should be positioned carefully.
 Step 3
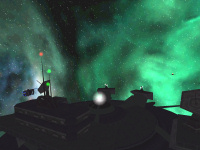
Although it may look different, the correct direction to the enemy base is always to the "right" side of your base. So assume you exit your base, the gate directly ahead is the opposite direction. You'll want to take the Stargate on the right side of the base, assuming 'right' is from the perspective of the exit.
 Step 4
When you reach the enemy base, the first threat is the Jamming Array. It'll pretty much stop you dead in your tracks. So you'll need to destroy it with long range weapons first, unless you want to become a sitting duck.
 Step 5
Once the array is down, you'll be able to target the Shield Generators without being locked down every 20 seconds. Each generator is fairly tough, so you'll need to focus on one at a time instead of splitting targets. It's best to indicate to your team *what* generator you are targeting first, either by giving directions or by placing a marker.
 Step 6
Once the generators are down, the first two structures that are open to attack are the Storage Silo and Repair Bay. It's up to you which one to target first, however cutting off the enemies supply to Energy and Shields is a good tactic, so the best bet is the Repair Hanger.
 Step 7
... And then you destroy the Storage Silo, which in turn results in the Command Tower becoming vulnerable.
 Step 8
The Command Tower is the toughest of all the structures, and will take a concentrated effort to destroy. Once it's destroyed, the game ends.

The centre system, which separates the Red and Blue base systems contains a varied selection of objects, including Maltu Orion Legion Fighters, Cruisers and a single heavy cruiser spawn (NPCs will spawn in various locations at different times). There is also an asteroid belt with an infested asteroid base. This base is also known as a mission complex, and you can enter solo or with team mates. Once inside, you��ll be locked in until the ten minute timer expires, or you complete the mission. No one else will able to get in and help at this point.
The adjoining systems contain the Red and Blue bases. Each base is scattered in a bubble formation, tightly placed as to not use too much space on the map. There is no other scenery in these systems due to the polygon amount of the bases themselves. There is however fighter spawns from the Maltu Orion Legion at the far edges. They will ignore the player bases entirely and just sit there until approached. These guard the exit systems. So if you get disoriented, remember heading toward the gate with these fighters is the wrong direction to the enemy base.
The systems beyond the bases are optional flying zones - the gates which lead in the OTHER direction. These places are packed with non player spawns including frigates, cruisers, battleships and other nasty stuff. Some of the stuff will be present when you arrive, or appear while your there. Others may take a while to appear depending on the difficulty of the spawn itself. There are also structures you can explore and missions that you can undertake to obtain new weaponry. Click here for a look at the full Hyperspace starmap.

It was not until much later that the Alliance finally began to build their own Stargate network. Utilizing the same basic underline technology as the original gates by reverse engineering, these new gates are intended only for small explorer vessels, personnel craft, fighters and small cruisers.
The Alliance has had a turbulent history, but is always striving to resolve the their struggles in hope for a better future. The inner planets of the Alliance are governed by parliaments, whom are also responsible for the terraforming of worlds - From inhospitable barren rocks to habitable lush worlds. This process takes several decades, and so the majority of colonies within the alliance are shielded environments either in domes or in planetary orbit.

The technology of the Maltu is considered equally as advanced as the Alliance, and most of their ships are essentially retrofitted Alliance hulls with factional paintwork. Some scientists within the legion were previously citizens of the Alliance, which is how they are able to keep up with Alliance science. The origin of the Legion is a mystery to most people, but it is rumored they were once part of an Intelligence arm within the government, which later rebelled against the Alliance. Why, how - No one exactly knows. All that is known is that one day an entire division within the Alliance just decided to pack their bags and leave for a new home, taking ships and equipment with them.
After failing to track down them for nearly ten years - It was, as if by accident, that a scout discovered them on a regular planetary survey mission. The Alliance was swift to dispatch representatives to this newly discovered and flourishing colony - Only to find a blockade upon their arrival, with the ultimatum to turn around or face death. The scars of the independence wars were still fresh - People were reluctant to spill any more blood, and so the Alliance gave up and disowned the former workers of a once prominent agency.

The Syndicate utilizes projectile weaponry on all their ships, which has nearly been phased out in the Alliance due to the payload size that could otherwise be used for essential equipment. The Syndicate constructs their own interstellar craft - The materials used are common to the system they inhabit, but the sheer brilliance of the craft baffles Alliance scientists to this day, who are unable to grasp how the Gemini Syndicate were able to build their ships - Which is the reason the Alliance hasn't done anything about the syndicate for nearly a century, because both sides would take heavy losses in all out conflict. Predictions are still upheld though, that one day something will be done to cull the Gemini war machine. It is said that the reason the Gemini Syndicate are able to build such impressive ships, is due to help from an outside force. Although many civilian planets do construct their own personalized space craft, all major components are variations of Alliance engineering. However the Syndicate, for example, have entirely different engineering methods including unique propulsion systems.


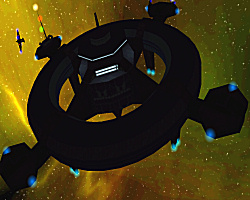
 These mobile setups are generally deployed by Carrier-class vessels, such as the Nova, over a period of about 24 hours. The outpost and all of its components are stored in pods that are unpacked once they are deployed. The unique ability of such outposts is that they can be packed up again and moved elsewhere.
The functions of Command Outposts are to provide fleets and squadrons a means for supply and refuel. Also, outposts are able to monitor movements of interstellar craft within a four jump radius - And can be fitted for numerous tasks such as science, research or combat.
Command Outposts with rerouted powergrids designed for combat have enough firepower to take on hoards of opponents - But due to the remoteness of these outposts, such setups are rarely used. The outposts themselves are poorly defended with very thin armour.
Special Features:
150% bonus to deep space scanners.
These mobile setups are generally deployed by Carrier-class vessels, such as the Nova, over a period of about 24 hours. The outpost and all of its components are stored in pods that are unpacked once they are deployed. The unique ability of such outposts is that they can be packed up again and moved elsewhere.
The functions of Command Outposts are to provide fleets and squadrons a means for supply and refuel. Also, outposts are able to monitor movements of interstellar craft within a four jump radius - And can be fitted for numerous tasks such as science, research or combat.
Command Outposts with rerouted powergrids designed for combat have enough firepower to take on hoards of opponents - But due to the remoteness of these outposts, such setups are rarely used. The outposts themselves are poorly defended with very thin armour.
Special Features:
150% bonus to deep space scanners.
 These outposts, usually well defended, are found in deep space systems where little resides. They serve mainly as research and scientific platforms. It is said that during the independance wars these outposts were often fitted with "experimental" weaponry, enabling them to surprise their attackers at the expense of creature comforts.
Special Features:
50% bonus to jamming ability.
These outposts, usually well defended, are found in deep space systems where little resides. They serve mainly as research and scientific platforms. It is said that during the independance wars these outposts were often fitted with "experimental" weaponry, enabling them to surprise their attackers at the expense of creature comforts.
Special Features:
50% bonus to jamming ability.
 Large refueling outpost for Maltu Orion Legion ships. Its docking bay can only support fighter sized craft, however it is capable of repairing and fueling larger ships.
Special Features:
25% bonus to jamming.
Large refueling outpost for Maltu Orion Legion ships. Its docking bay can only support fighter sized craft, however it is capable of repairing and fueling larger ships.
Special Features:
25% bonus to jamming.
 Secret labs are known to exist within the borders of Maltu space. These labs are often found inside huge asteroids, and while they are not capable of receiving any craft other than personnel transports - It is rumoured the labs themselves are very large.
Special Features:
None
Secret labs are known to exist within the borders of Maltu space. These labs are often found inside huge asteroids, and while they are not capable of receiving any craft other than personnel transports - It is rumoured the labs themselves are very large.
Special Features:
None
 Gemini Temples are rare stations from the humble early days of the Gemini Syndicate. When the Syndicate was first formed, many of these structures were built in honour of the various founders. Today, they are mostly abandoned and unused.
 The Pegasus is a squadron fighter assigned to protect the assets of the Alliance - It is believed around two thousand are currently in active service. They are equipped with standard blaster cannons. Usually, Pegasus fighters are found in groups of three or four. The Mark II Pegasus is a response to the need for a ship capable of intercepting targets faster.
Special Features:
None
The Pegasus is a squadron fighter assigned to protect the assets of the Alliance - It is believed around two thousand are currently in active service. They are equipped with standard blaster cannons. Usually, Pegasus fighters are found in groups of three or four. The Mark II Pegasus is a response to the need for a ship capable of intercepting targets faster.
Special Features:
None
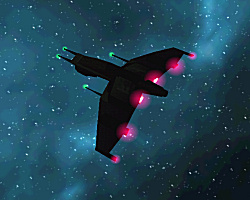
 The Horus interceptor is highly favoured among combat pilots who have a thing for speed. With twelve powerful thrusters it is able to accelerate at a rate greater than most Interceptors in the galaxy. Despite its ability at rapid interception of targets, the Horus lacks the power to sustain heavy weaponry for long periods of time - And has fairly weak shields. This is something that must be kept in mind for anyone piloting it. Like all modern fighters, it can easily be refitted to carry different kinds of weapons.
Special Features:
50% shield resistance
The Horus interceptor is highly favoured among combat pilots who have a thing for speed. With twelve powerful thrusters it is able to accelerate at a rate greater than most Interceptors in the galaxy. Despite its ability at rapid interception of targets, the Horus lacks the power to sustain heavy weaponry for long periods of time - And has fairly weak shields. This is something that must be kept in mind for anyone piloting it. Like all modern fighters, it can easily be refitted to carry different kinds of weapons.
Special Features:
50% shield resistance
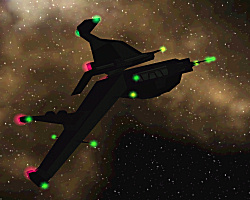
 The Seth is the mid-range fighter for Alliance combat pilots. It doesn't have multilayered shielding or powerful thrusters, but it does every job well. The Seth can handle most fights with ease, using an advanced powercore to sustain its weaponry while still being manueverable enough to avoid weapons fire. The Seth is popular among Trainee pilots due to its good thrust and sterdy shields. Like all modern fighters, it can easily be refitted to carry different kinds of weapons.
Special Features:
70% shield resistance
The Seth is the mid-range fighter for Alliance combat pilots. It doesn't have multilayered shielding or powerful thrusters, but it does every job well. The Seth can handle most fights with ease, using an advanced powercore to sustain its weaponry while still being manueverable enough to avoid weapons fire. The Seth is popular among Trainee pilots due to its good thrust and sterdy shields. Like all modern fighters, it can easily be refitted to carry different kinds of weapons.
Special Features:
70% shield resistance
 The Khonsu, or more commonly known as the flying brick among veteran pilots, is the most powerful fighter sized craft available to Alliance military. With an advanced series of shield generators, it is able to project multilayered shielding that enables the craft to absorb 90% of the energy directed toward it. It also has the highest energy output and storage, enabling it to match the firepower of any threat, even ships ten times its size. The only drawback is speed, which is nearly half that of a Seth Fighter. (Note, this was formerly called the 'Isis' bomber - I know right? It was 2006)
Special Features:
90% shield resistance (included in HP calculation)
The Khonsu, or more commonly known as the flying brick among veteran pilots, is the most powerful fighter sized craft available to Alliance military. With an advanced series of shield generators, it is able to project multilayered shielding that enables the craft to absorb 90% of the energy directed toward it. It also has the highest energy output and storage, enabling it to match the firepower of any threat, even ships ten times its size. The only drawback is speed, which is nearly half that of a Seth Fighter. (Note, this was formerly called the 'Isis' bomber - I know right? It was 2006)
Special Features:
90% shield resistance (included in HP calculation)
 The Deimos cruiser is an old Alliance design, but still a worthy opponent. Usually assigned to protect deep space assets.
Special Features:
25% bonus to rocket reload.
The Deimos cruiser is an old Alliance design, but still a worthy opponent. Usually assigned to protect deep space assets.
Special Features:
25% bonus to rocket reload.
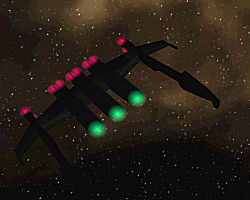
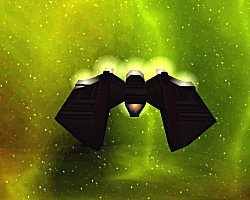
 The Hawk Fighter is a fifty year old Alliance design, but still it is widely used by several organisations as protection. The Maltu Orion Legion deploy a great number of Hawks throughout their region of space. They are widely found among the 'Hope' and 'Genesis' regions. Although the Hawk is not capable of reaching the speeds of the Horus Interceptor, it is still quite capable of maneuvering in combat. The Mark II version of the Hawk is a radically redesigned craft that the Maltu Legion exclusively uses.
Special Features:
25% reduction in Railgun energy usage.
Possible Salvage:
Maltu Railgun
The Hawk Fighter is a fifty year old Alliance design, but still it is widely used by several organisations as protection. The Maltu Orion Legion deploy a great number of Hawks throughout their region of space. They are widely found among the 'Hope' and 'Genesis' regions. Although the Hawk is not capable of reaching the speeds of the Horus Interceptor, it is still quite capable of maneuvering in combat. The Mark II version of the Hawk is a radically redesigned craft that the Maltu Legion exclusively uses.
Special Features:
25% reduction in Railgun energy usage.
Possible Salvage:
Maltu Railgun
 Merlin Frigates are fearsome ships capable of dealing massive damage in groups. A squadron of Merlin craft are capable of overpowering ships much larger. Although they may appear slow and harmless, approach with care.
Special Features:
None.
Possible Salvage:
25mm ION
Merlin Frigates are fearsome ships capable of dealing massive damage in groups. A squadron of Merlin craft are capable of overpowering ships much larger. Although they may appear slow and harmless, approach with care.
Special Features:
None.
Possible Salvage:
25mm ION
 Stork Bombers are an older version of the Mortifier bomber, but still a formidable craft which can be fitted with a variety of payloads from light rockets to heavy cruise missiles.
Special Features:
None.
Possible Salvage:
Hornet Rockets
Stork Bombers are an older version of the Mortifier bomber, but still a formidable craft which can be fitted with a variety of payloads from light rockets to heavy cruise missiles.
Special Features:
None.
Possible Salvage:
Hornet Rockets
 The Hunter-Cruiser has seen five variations over the past few decades. The Hunter was one of the first combat Cruisers comissioned by the Alliance - And although many of them were destroyed in the independence wars, they are still widely used to protect important assets. The MOL Hunter is based on the latest Mark V Hunter, although the actual frame was originally designed for the Mark IV.
Special Features:
Proximity Shockbomb (Fore)
Possible Salvage:
50mm ION
The Hunter-Cruiser has seen five variations over the past few decades. The Hunter was one of the first combat Cruisers comissioned by the Alliance - And although many of them were destroyed in the independence wars, they are still widely used to protect important assets. The MOL Hunter is based on the latest Mark V Hunter, although the actual frame was originally designed for the Mark IV.
Special Features:
Proximity Shockbomb (Fore)
Possible Salvage:
50mm ION
 The Inferno battlecruiser is one of the most feared cruisers in active service by the MOL, and is also one of the newest ships to come off the construction line - Fitted with advanced power cores and layered armor, the Inferno will light up any opponent from the get-go with its heavy blaster weaponry. Approach with extreme caution.
Special Features:
Large Proximity Shockbomb (Dorsal)
Possible Salvage:
Cruise Missiles
The Inferno battlecruiser is one of the most feared cruisers in active service by the MOL, and is also one of the newest ships to come off the construction line - Fitted with advanced power cores and layered armor, the Inferno will light up any opponent from the get-go with its heavy blaster weaponry. Approach with extreme caution.
Special Features:
Large Proximity Shockbomb (Dorsal)
Possible Salvage:
Cruise Missiles
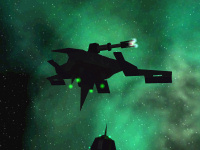
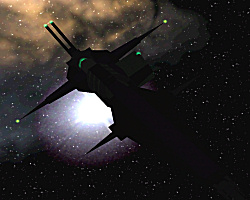
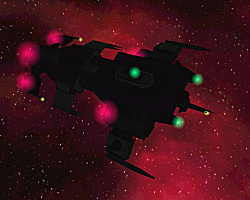
 The Munin is the flagship of the MOL fleet, based on the now retired Conquistador design. Its irregular shape is considered an eyesore to many, but while it lacks in aesthetics it more than makes up for it in combat ability. It's also capable of entering Hyperspace for a few seconds, which allows it to quickly traverse the distance of a solar system - However, there have been many reports of faulty drives on the Conquistador hulls, most likely as a result of premature installation.
Special Features:
Short Range Hyperspace Drive
Possible Salvage:
Cruise Missiles,
Plasma Railgun
The Munin is the flagship of the MOL fleet, based on the now retired Conquistador design. Its irregular shape is considered an eyesore to many, but while it lacks in aesthetics it more than makes up for it in combat ability. It's also capable of entering Hyperspace for a few seconds, which allows it to quickly traverse the distance of a solar system - However, there have been many reports of faulty drives on the Conquistador hulls, most likely as a result of premature installation.
Special Features:
Short Range Hyperspace Drive
Possible Salvage:
Cruise Missiles,
Plasma Railgun
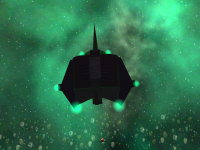
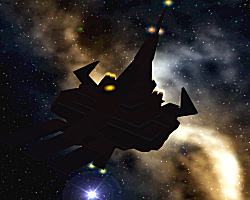
 The Demolisher Destroyer is a ship favoured by veteran ship captains because of its success rate in battle. No ship in its weight classs can match the firepower of a Destroyer. Only those highly in favour are able to captain the Demolisher. It's a rare ship - Very few exist in the Maltu Legion, and not that many are present in the Alliance either. The Demolisher is fitted with powerful torpedo launchers and ablative hull armor.
Special Features:
None
Possible Salvage:
Orion Corona's
The Demolisher Destroyer is a ship favoured by veteran ship captains because of its success rate in battle. No ship in its weight classs can match the firepower of a Destroyer. Only those highly in favour are able to captain the Demolisher. It's a rare ship - Very few exist in the Maltu Legion, and not that many are present in the Alliance either. The Demolisher is fitted with powerful torpedo launchers and ablative hull armor.
Special Features:
None
Possible Salvage:
Orion Corona's
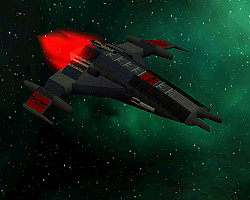
 The Gemini Escort is the most common fighter used in the Syndicate, and is one of the most dangerous ships in its weight class.
Special Features:
None
Possible Salvage:
Beserker Missiles
The Gemini Escort is the most common fighter used in the Syndicate, and is one of the most dangerous ships in its weight class.
Special Features:
None
Possible Salvage:
Beserker Missiles
 Knights are light squadron Interceptors commonly found at Gemini Outposts or onboard Carriers.
Special Features:
None
Possible Salvage:
Hornet Rockets
Knights are light squadron Interceptors commonly found at Gemini Outposts or onboard Carriers.
Special Features:
None
Possible Salvage:
Hornet Rockets
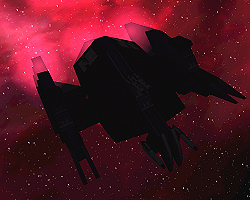
 The Barrager is the mainstay of the Gemini fleet, and is something of a monster in both its size and firepower. While Gemini ships are considered a severe threat, they are infact structurally quite weak compared to similar sized ships. The Barrager is no exception in this case because of its large payload bays reducing the ability to effectively coat the ship with armour. However, this is more than made up for in the sheer brute force of the Barragers artillery guns.
Special Features:
25% bonus to tracking efficiency.
Possible Salvage:
Beserker Missiles,
Sphinx Mines
The Barrager is the mainstay of the Gemini fleet, and is something of a monster in both its size and firepower. While Gemini ships are considered a severe threat, they are infact structurally quite weak compared to similar sized ships. The Barrager is no exception in this case because of its large payload bays reducing the ability to effectively coat the ship with armour. However, this is more than made up for in the sheer brute force of the Barragers artillery guns.
Special Features:
25% bonus to tracking efficiency.
Possible Salvage:
Beserker Missiles,
Sphinx Mines
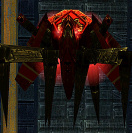
 Very little information is available on the Hellbore - Mainly because very few people have ever seen one, and even fewer people have seen one and lived to tell the tale. They are usually found in the deep regions of space that no one frequents, or in orbit around Gemini Prime, the home of the Gemini Syndicate. Few scans have been collected of the Hellbore, but enough has been obtained to gather a reasonable idea of its threat level to an Alliance outpost - Severe. It is not known how the Gemini people were able to build such a deadly vessel. Many people within the government say the Hellbore could pose a significant threat to weaker Alliance worlds that are outside of the RRA (rapid-response-area) - and that countermeasures must be put in place soon.
Special Features:
Capital Strike Shockbomb (Fore),
50% bonus to Missile reload,
500% bonus to Hyperspace range.
Very little information is available on the Hellbore - Mainly because very few people have ever seen one, and even fewer people have seen one and lived to tell the tale. They are usually found in the deep regions of space that no one frequents, or in orbit around Gemini Prime, the home of the Gemini Syndicate. Few scans have been collected of the Hellbore, but enough has been obtained to gather a reasonable idea of its threat level to an Alliance outpost - Severe. It is not known how the Gemini people were able to build such a deadly vessel. Many people within the government say the Hellbore could pose a significant threat to weaker Alliance worlds that are outside of the RRA (rapid-response-area) - and that countermeasures must be put in place soon.
Special Features:
Capital Strike Shockbomb (Fore),
50% bonus to Missile reload,
500% bonus to Hyperspace range.
