We found the 'phibs. I'll post the replay movies once I find a suitable place to put them up; one is of the action overall and one is of the torpedo evasion sequnence.
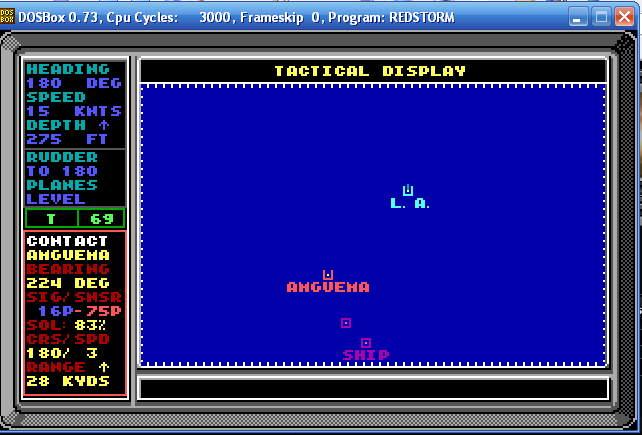
The Amguema (god I hate spelling that name) was a transport and thus a primary target per our orders. The Udaloy was almost certainly the best ASW ship in the screening force. Thus, it was time to resolve the deadlock by lofting some TASMs.
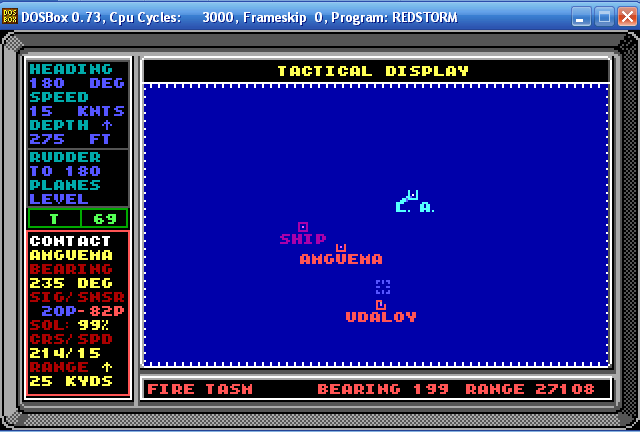
What the picture also doesn't quite show is that every ship in the force just went nuts detecting the first missile. You can see the Udaloy is already turning to charge, blissfully unaware he's about to have his own missile headed at him.
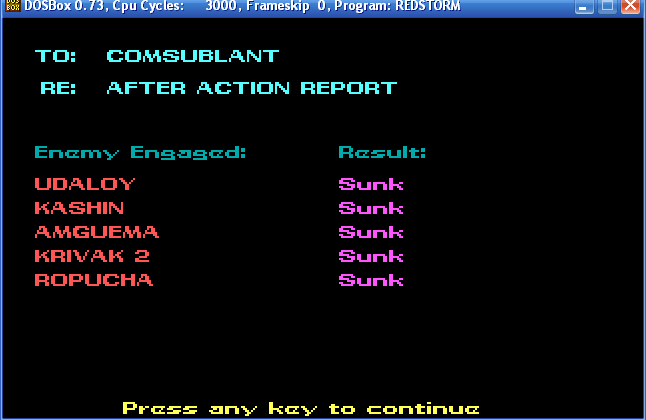
The Amguema didn't survive the Tomahawk hit, but just to mock me, the Udaloy did. A rocket-boosted torpedo arrived, but out of posistion and it never detected me or required evasion, so I fired a second TASM to finish the Udaloy.
Then we get a pair of other rocket-boosted torpedos lofted my way in return for the second shot at the Udaloy. The first immediately acquired on entering the water. (Torpedos don't account for depth in this game, 3D was a little beyond its capablities when one of its graphics cards options was 2-color.) A noisemaker was released, along with a decoy, to confuse the torpedo. This was successful, and the good ship SECTORGAME ROCKS actually managed to turn inside the torpedo's circular search pattern after it passed through the noisemaker. (Which is nothing more or less than a canister of pure sodium tablets, resulting in making lots of bubbles, and hence both noise and an active sonar-reflective target.) Accelerating to 30 knots en route to 900 feet, the second torpedo enters the water and also immediately acquires...the decoy I had launched earlier. We were never in danger.
After that sequence, it was time to try and sort out who was still left and what to do. The Udaloy had gone down (you get a little animation for every hit that lets you know whether you sunk the target or not, I'll have to capture it later), as had the transport, but I'd had intermittent contacts with three more ships.
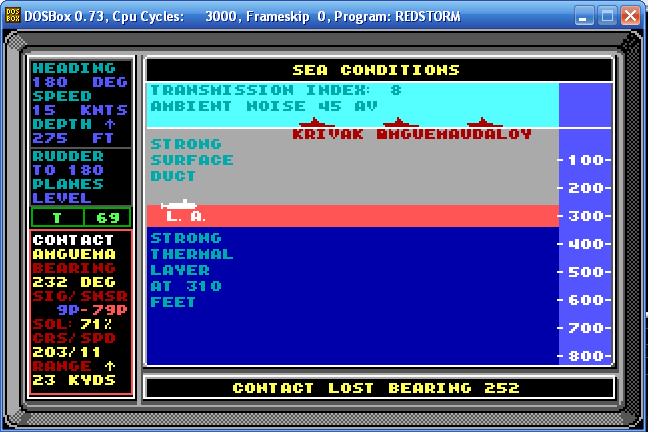
I came back up from the abyssal depths to 275 feet, slowing to ten knots before doing so. Then we listened for about a minute and a half, obtaining a solid posistion on a second amphib, a Ropucha LST headed due west, and tracking it briefly (the short grey track with the skip in it). I also very briefly had a 75% solution on the Krivak, but lost contact again.
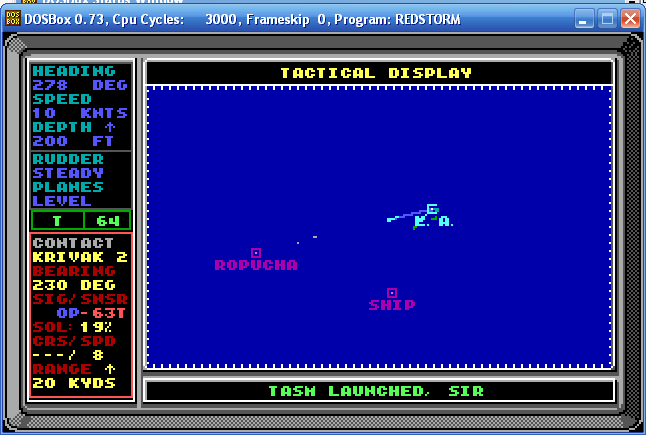
We emerged from the Abyssal Zone once more to locate the last ship in the formation. Having a good bearing, but not yet a range, and fairly sure he probably had both, a final TASM was fired as a snapshot with an activation distance at 5000 yards. We immediately started to dive again and accelerate in anticipation of a return launch. The Tomahawk found its target. The target, a Kashin-class destroyer, did not manage to return this one, took the hit, and sank.
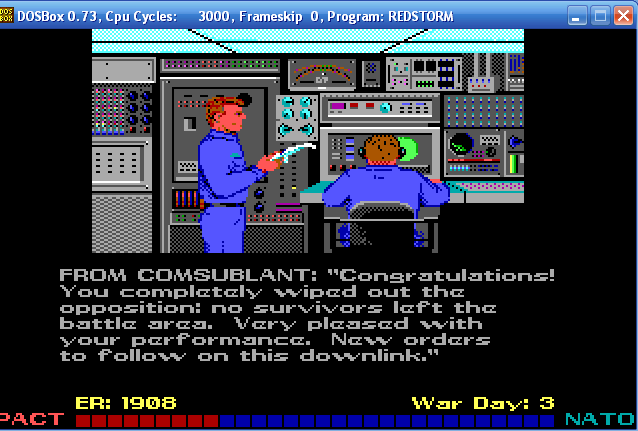
ER is your efficency rating. It goes up for sinking ships, not getting hit yourself, and I think not being detected by enemies or enemy weapons during your attack. It goes down for expending weapons, getting hit, and probably getting detected. Ours is pretty good for only two engagements, one of which I screwed up. The little thing along the bottom gives a relative idea of how the war is going. Random events can alter it; so, obviously, can your actions. Wiping out everything Russian that was currently floating has done much to turn the tide, as you can see.