Texture drawing
Posted: Wed May 03, 2006 2:16 pm
Ok, so I've gone even further down madman lane here, but now I'm a bit stuck. I have a HUGE surface area to texture, and only one fairly limited method of drawing textures, which looks horrible when overused.
Obviously, I need more ways of doing it - and especially suggestions as to how to improve my bog standard boring one that I've overused so far.
So, that's what this thread's for - how do the modders/artists round here do metal - especially hull plates? The more different methods/tutorials/tips we get the better.
Here's mine... (copied&pasted from HLP)
For PSP 9, you do the following:
1 ) Set colour 1 to a dark grey & colour 2 to pitch black
2 ) Flood fill the entire area you want to turn into plating (if you have pre-existing plate outlines in place, make sure they're on a separate higher layer or something)
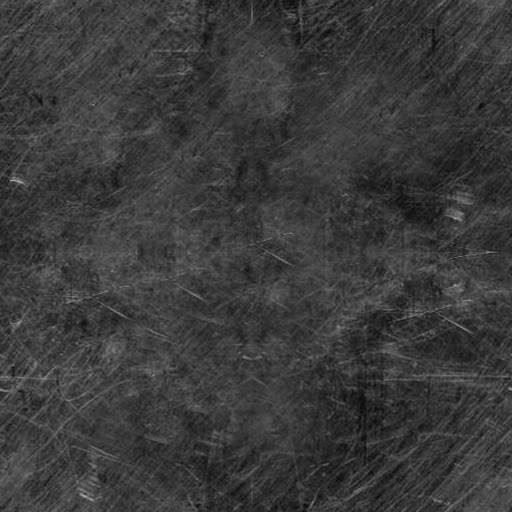
3 ) Set colour 2 to use this (from BW) or a similar sort of texture with an angle of 38, and a scale of about 48
4 ) Apply it to your solid filled base colour (the whole thing) twice or so to get the desired brightnes of that bit of hull.
5 ) If you havn't already, create your hull plate outlines (I've found black, 1 pixel wide, no AA lines work best) and make sure they're a raster layer.
6 ) Merge all the layers so the outlines are on the same layer as the background hull.
7 ) Magic-wand-select (tolerance = 40, no AA) each individual plate outline you want to raise (if you've never heard of the wand, it's basically a 'select all connected pixels of colour X, with a tolerance factor)
8 ) When all the plates you want to raise are selected, use the bevel tool to raise them all. I found the following properties to work best for the plating effect: Straight slope, Width = 3, Depth = 2, Shininess = 28, Angle = 39, Intensity = 43, Elevation = 46, Light = White, All other settings = 0
Result: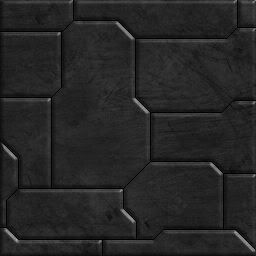 And that should do it. Now, I'm sure all the texture Guru's here are looking at this shaking their heads in pity, but it provides a decent base technique, and needless to say, you can fiddle with any part of it to best suit your ship.
Obviously, I need more ways of doing it - and especially suggestions as to how to improve my bog standard boring one that I've overused so far.
So, that's what this thread's for - how do the modders/artists round here do metal - especially hull plates? The more different methods/tutorials/tips we get the better.
Here's mine... (copied&pasted from HLP)
For PSP 9, you do the following:
1 ) Set colour 1 to a dark grey & colour 2 to pitch black
2 ) Flood fill the entire area you want to turn into plating (if you have pre-existing plate outlines in place, make sure they're on a separate higher layer or something)
3 ) Set colour 2 to use this (from BW) or a similar sort of texture with an angle of 38, and a scale of about 48
4 ) Apply it to your solid filled base colour (the whole thing) twice or so to get the desired brightnes of that bit of hull.
5 ) If you havn't already, create your hull plate outlines (I've found black, 1 pixel wide, no AA lines work best) and make sure they're a raster layer.
6 ) Merge all the layers so the outlines are on the same layer as the background hull.
7 ) Magic-wand-select (tolerance = 40, no AA) each individual plate outline you want to raise (if you've never heard of the wand, it's basically a 'select all connected pixels of colour X, with a tolerance factor)
8 ) When all the plates you want to raise are selected, use the bevel tool to raise them all. I found the following properties to work best for the plating effect: Straight slope, Width = 3, Depth = 2, Shininess = 28, Angle = 39, Intensity = 43, Elevation = 46, Light = White, All other settings = 0
Result: